


Your Essential Plumbing Rough In Guide for Los Angeles
- Jan 15
- 16 min read
Planning a new build in Pasadena or tackling a major kitchen remodel in Santa Monica? Before you even think about hanging drywall, you're faced with the most critical phase of your plumbing: the rough-in. This is the foundational stage where every supply line, drain pipe, and vent is installed within the walls, floors, and ceilings. Getting this plumbing rough in guide right is non-negotiable for passing Los Angeles city inspections and preventing costly repairs in the future.
What a Plumbing Rough In Really Means for Your Home
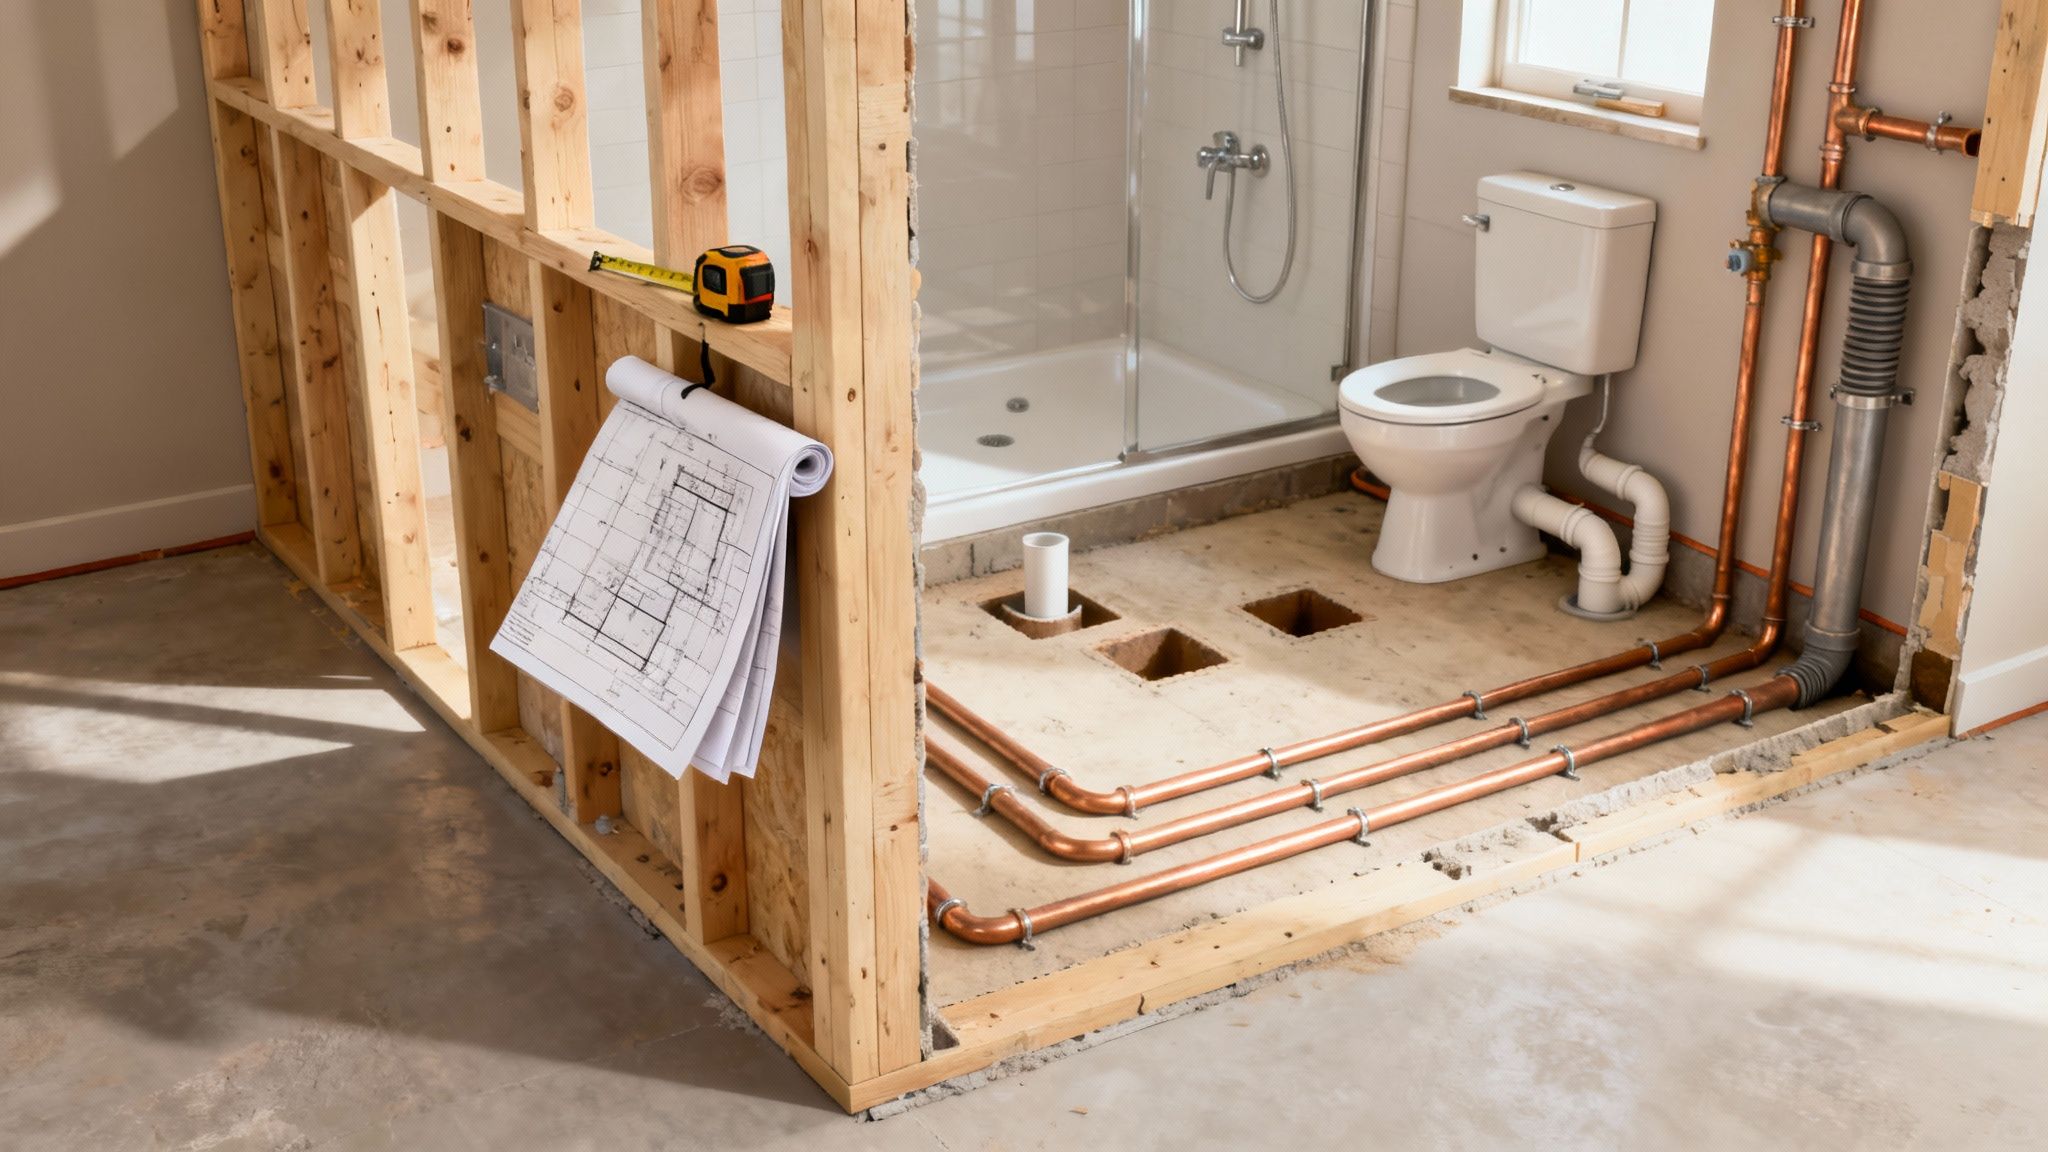
Think of the plumbing rough-in as your home's circulatory system. It’s the hidden network that delivers clean water exactly where you need it and carries wastewater safely away. All of this happens behind the scenes, long before insulation is installed and the walls are closed up. This phase isn’t just about connecting a few pipes; it's about precise engineering that lays the groundwork for every toilet, sink, shower, and washing machine in your home.
An incorrect rough-in is a future disaster waiting to happen. A drain line with the wrong slope will lead to chronic clogs. A water line that’s off by a few inches can make it impossible to install your new vanity without tearing open a brand-new wall. A perfect rough-in ensures your home is functional, safe, and compliant with California’s stringent building codes.
The Foundation of a Healthy Home
The rough-in is where your plumbing blueprints spring to life. It’s the meticulous process of placing and securing every component needed to support the fixtures you’ll use every single day. This critical network includes:
Water Supply Lines: These are the pipes that bring hot and cold water to your faucets and appliances.
Drain Pipes: Relying on gravity, these pipes are sloped just right to whisk wastewater out of your home.
Vent Stacks: This is the unsung hero of your plumbing system. Vent pipes allow sewer gases to escape harmlessly through the roof and, just as importantly, let air in so your drains can flow smoothly without gurgling.
The real-world importance of a proper rough-in becomes crystal clear on a big job, like adding a new bathroom in your basement. Projects like these show just how complex and vital it is to get every measurement, angle, and connection perfect from the very beginning.
Why Professional Execution Matters
The plumbing industry is a massive part of the U.S. economy, valued at an estimated $89.8 billion in 2023. For developers and homeowners here in Los Angeles, the financial stakes are even higher. A shoddy rough-in can quickly lead to failed inspections, project delays, expensive tear-outs, and devastating water damage. This is exactly why professional execution for all new construction plumbing is non-negotiable.
A perfect plumbing rough-in is the ultimate form of prevention. It’s the meticulous, unseen work that protects your home's value and saves you from future headaches, ensuring everything from a simple flush to a hot shower works flawlessly for decades.
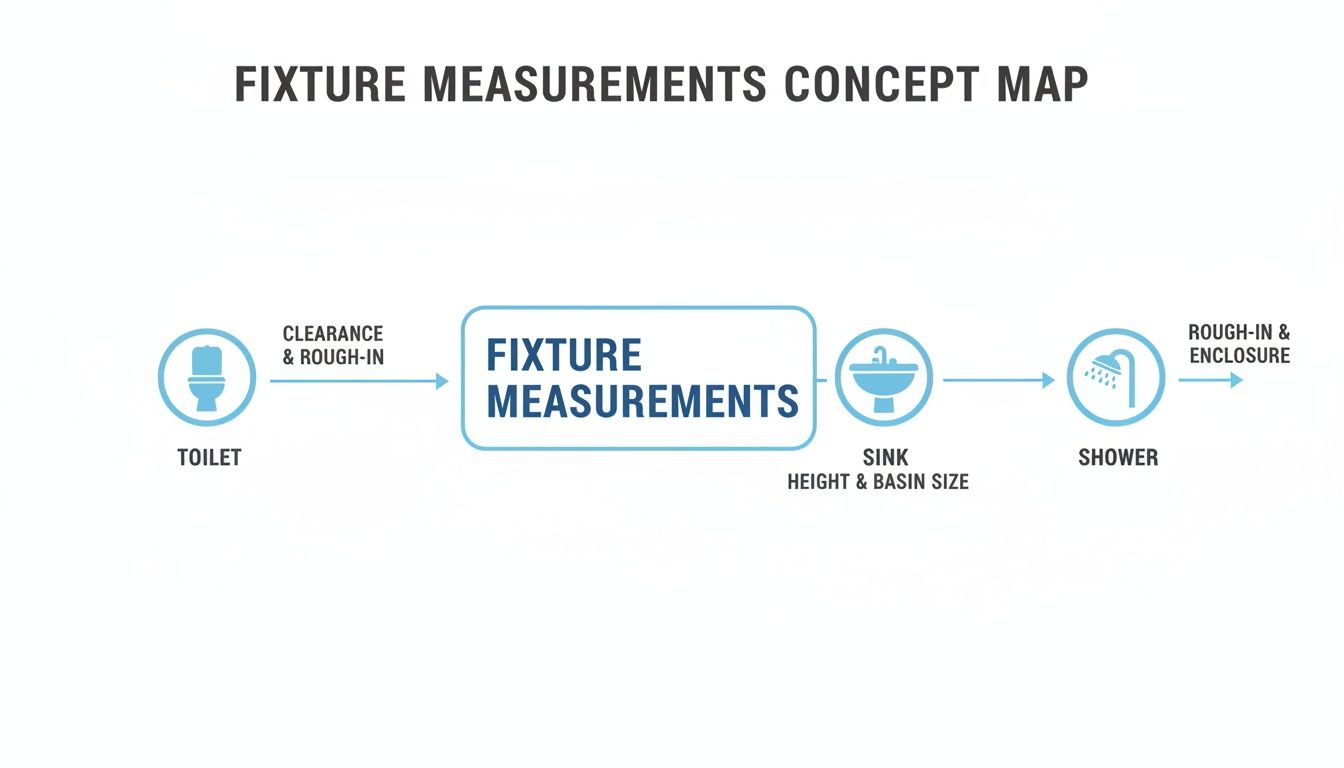
Getting Your Measurements Right for Kitchen and Bath Fixtures
When you’re in the middle of a plumbing rough-in, an inch isn’t just an inch—it’s the difference between a smooth installation and a project-killing failed inspection. Get the measurements wrong, and you're looking at tearing open walls you just closed up. This is your no-nonsense guide to getting those critical fixture placements right the first time, ensuring your layout is functional and up to California code.
Think of the pipe stubs in your walls as the foundation for every fixture you'll install later. The toilet, the sink, the shower—they all depend on those pipes being in the exact right spot. Let's break down the numbers you need to know.
Toilet Rough In Dimensions
Nothing's worse than installing a beautiful new floor only to find the toilet doesn't fit. Correct placement is non-negotiable for both comfort and code compliance.
Drain Pipe Placement: The bullseye for your toilet drain (the closet flange) needs to be 12 inches off the finished wall. Yes, 10-inch and 14-inch rough-in toilets are out there, but 12 inches is the gold standard for virtually every home in Los Angeles.
Water Supply Line: Position the cold water supply stub-out about 6 inches to the left of the toilet's centerline and roughly 8 inches up from the finished floor. This gives you plenty of room to install the shut-off valve and connect the supply line without cramping everything behind the bowl.
Sink Rough In Dimensions
From a compact pedestal sink in a Pasadena powder room to a sprawling double vanity in a Santa Monica master bath, getting the sink rough-in right is key to a clean, professional look. It's all about making sure the P-trap fits neatly and the faucet lines connect without a fight.
Drain Pipe Height: The center of the sink's drain pipe should sit between 18 to 20 inches above the finished floor.
Water Supply Lines: Bring the hot and cold water lines out of the wall at 20 to 24 inches from the floor. Keep them spaced 4 inches apart from each other—hot on the left, cold on the right.
Shower and Bathtub Rough In Dimensions
Showers and tubs are where user experience really comes into play. The height of the valve, the placement of the shower head—these are details you'll notice every single day. You have to plan the water supply and drainage with total precision.
If you want to see how these measurements fit into the bigger picture of a full remodel, our guide on kitchen and bathroom plumbing services can give you some great real-world context.
Getting the rough-in dimensions right isn't just a technicality—it's the foundation of ergonomic design. Proper placement ensures fixtures are comfortable to use, easy to clean, and accessible for future maintenance, directly impacting the daily livability of your space.
Here’s a look at the key numbers for showers and tubs:
Shower Drain: A shower needs a 2-inch drain pipe. You absolutely must center it perfectly with where the drain hole on your shower base will be.
Tub Drain: Bathtubs generally use a 1 ½-inch drain. The exact placement will depend on your specific tub model, but it’s often set 14 to 16 inches from the wall.
Mixing Valve Height: The valve that controls your water temperature should be installed 36 to 48 inches off the finished floor. You can tweak this for personal preference or to meet ADA standards.
Shower Head Stub-Out: Place the pipe for the shower head high and proud at 78 to 80 inches above the floor, making sure it’s centered over the drain.
Tub Spout Stub-Out: The stub-out for the tub spout should be positioned about 4 to 6 inches above the tub's overflow rim.
Getting a handle on these standard measurements is a huge step toward a successful plumbing rough-in. When you stick to these guidelines, you're building a rock-solid foundation that guarantees your fixtures won't just fit—they'll work flawlessly for years.
For a quick reference, here’s a table with the key numbers all in one place.
Standard Rough In Measurements for Common Fixtures
Fixture | Drain Pipe Height (from floor) | Water Supply Lines Height (from floor) | Notes and LA County Considerations |
|---|---|---|---|
Toilet | N/A (Floor Mount) | 8 inches | Drain center must be 12 inches from the finished wall. Supply line 6 inches left of center. |
Bathroom Sink | 18 - 20 inches | 20 - 24 inches | Keep water lines 4 inches apart (hot on left, cold on right). |
Kitchen Sink | 18 - 20 inches | 20 - 24 inches | Similar to a bathroom sink, but always check specs for deep basin or garbage disposal models. |
Shower | N/A (Floor Mount) | 36 - 48 inches (Valve) | Shower head stub-out at 78-80 inches. Requires a 2-inch drain. |
Bathtub | Varies by tub model | 36 - 48 inches (Valve) | Tub spout 4-6 inches above the tub rim. Drain is typically 1.5 inches. |
Washing Machine | 30 - 36 inches (Standpipe) | 42 - 48 inches | The drain standpipe needs to be at least 18 inches long and use a 2-inch pipe. |
Always remember to measure from the finished floor level, not the subfloor. A little foresight here saves a ton of headaches later on.
Designing Your Supply, Drain, and Vent Systems
A plumbing system is more than just a bunch of pipes hidden in your walls—it's a complete ecosystem designed to keep your home safe and running smoothly. The best way to think about it is like a miniature city infrastructure. You have pressurized supply lines acting as the water main, bringing fresh, clean water right to your fixtures. Then you have the drain lines, which are your sewer system, safely carrying wastewater away.
But there's a third player that makes it all possible: the vent system. It's the unsung hero of what we call the Drain-Waste-Vent (DWV) system. Without it, you’d be looking at a whole host of problems, from gurgling sinks to nasty smells. Getting this trio designed correctly is the absolute foundation of any solid plumbing rough-in.
The Unseen Importance of the Vent System
Vents are basically the lungs of your plumbing. Every time water rushes down a drain, it pushes air out of the way, and that air needs to be replaced. If there’s no vent, the drain will gasp for air wherever it can, creating a vacuum. That "gurgle" you hear from a slow drain? That's the sound of your pipes struggling to breathe.
Worse yet, that vacuum can be strong enough to suck the water right out of the P-trap—that U-shaped pipe under every sink and drain. That little bit of water is the only thing stopping sewer gas from creeping into your Los Angeles home. A good vent system keeps those traps full and your air clean. It’s that simple.
Gravity Is Your Best Friend in Drain Design
Your supply lines have pressure pushing water through them, but your drain system has only one thing on its side: gravity. For gravity to do its job, every horizontal drain pipe has to have a very specific downward slope, or "pitch." The code here in California is crystal clear on this: ¼ inch of fall for every foot of pipe.
Too little slope? Waste and water just sit there, eventually causing a nasty clog.
Too much slope? You might think that's a good thing, but it's not. The water will zip right past the solid waste, leaving it behind to cause—you guessed it—another clog.
Hitting that perfect quarter-inch-per-foot grade is non-negotiable. It’s what lets gravity do the work of clearing your lines every single time. It's also critical to account for the fixtures themselves, especially when planning for bathroom vanity installation, including plumbing considerations.
Pipe Sizing and Routing for LA Homes
Choosing the right pipe size isn't a guessing game. It's all laid out in the Uniform Plumbing Code (UPC), which we follow to the letter across Los Angeles County. The size of the drain and vent pipe is determined by the fixture it’s serving.
This chart gives you a good idea of the basics for common household fixtures.
As you can see, different fixtures have very different demands.
A toilet, for example, needs a hefty 3-inch or 4-inch drain line to handle that powerful flush. A bathroom sink, on the other hand, works just fine with a much smaller 1 ½-inch drain. Vent sizing is just as important and is based on how many fixtures it's serving. Get these sizes right, and the system works flawlessly. Get them wrong, and you're just building future problems into the walls.
Your DWV system is a delicate balance of water, waste, and air. Proper venting, precise slope, and correct pipe sizing work together to create a silent, efficient network that protects your home's health and functionality.
If you’re dealing with recurring clogs or slow drains in your current home, it could be a sign of an old installation that didn't get the slope or venting right. The only way to know for sure what's going on in those hidden pipes is with a professional look. A sewer camera inspection can quickly uncover design flaws from a past job, showing you exactly why getting the rough-in right from the start is so important.
Choosing the Right Materials for Lasting Results
The choices you make during a plumbing rough-in will quite literally be sealed inside your walls for the next 50 years. This isn't just about picking pipes; it's a critical decision that dictates how durable your system will be, how much maintenance it'll need, and whether it passes muster with Los Angeles County codes. This is no time to cut corners—it’s about building a rock-solid system that stands the test of time.
Plumbing materials have come a long way. Galvanized iron was the go-to from the late 1800s until around 1960, when copper took over. Material shortages during World War II pushed the industry toward plastics, and by 1978, California was already leading the nation in water conservation laws. This history lesson matters because it shows how Los Angeles has always been at the forefront of plumbing innovation and regulation. You can dive deeper into the evolution of plumbing systems on SkillcatApp.com.
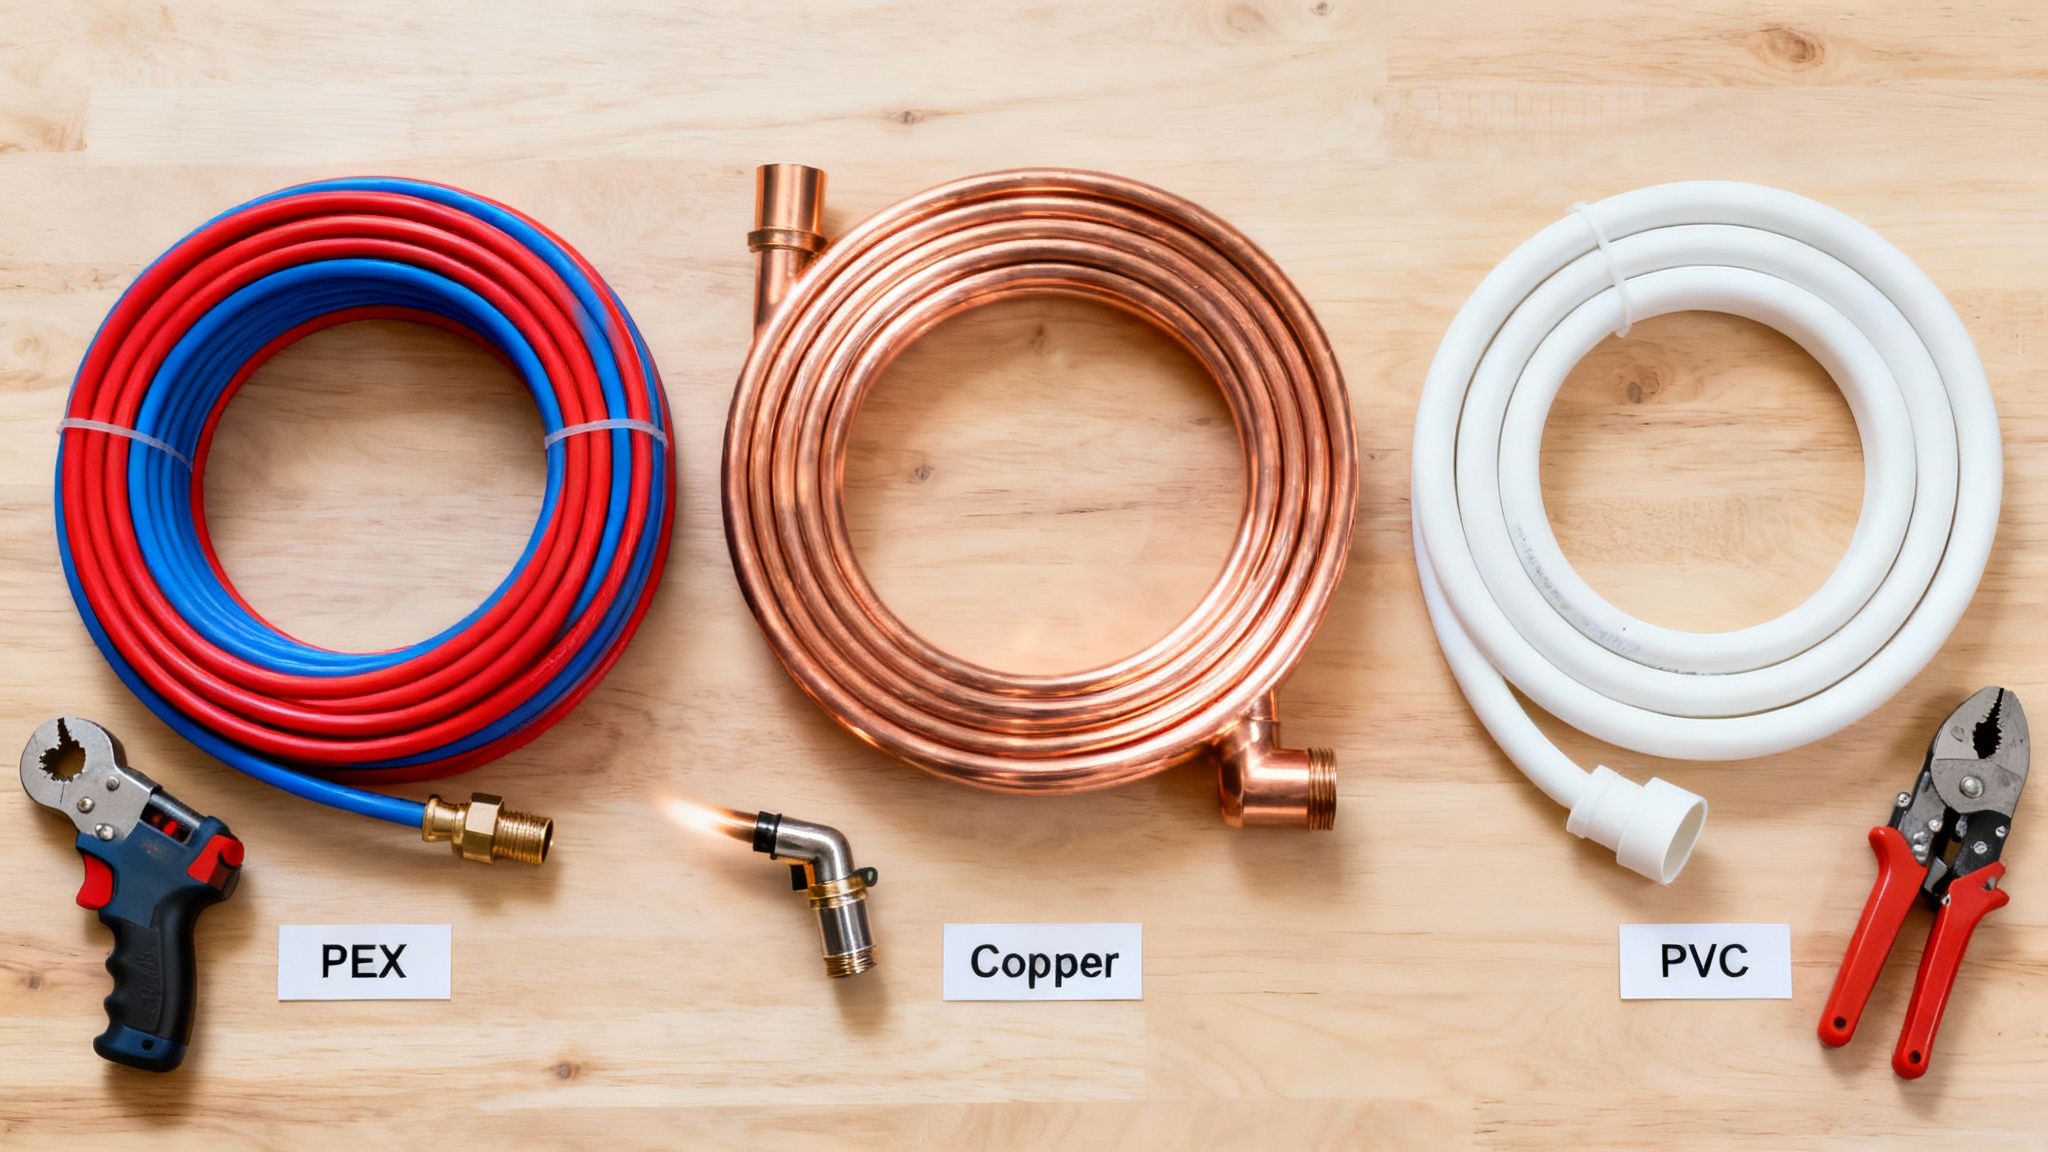
Supply Lines: PEX vs. Copper
When it comes to the pressurized lines delivering your hot and cold water, the conversation today centers on two main players: PEX and copper. Each has its place, and the right choice often depends on the specifics of the job.
PEX (Cross-Linked Polyethylene) has become a favorite in new construction and remodels across the LA area, and it's easy to see why.
Flexibility: PEX can snake around corners without needing extra fittings. Fewer joints mean fewer potential points of failure.
Cost-Effective: The material itself is generally cheaper than copper, and the faster installation time saves on labor costs.
Durability: It’s resistant to scale buildup and corrosion, which is a huge plus for maintaining water quality over the long haul.
Copper has been the industry benchmark for generations, known for its incredible longevity and reliability.
Proven Track Record: It’s not uncommon for copper pipes to last 50+ years. Plus, it's naturally resistant to bacterial growth.
Rigidity: Its solid structure is perfect for exposed stub-outs where you need a firm, unmoving connection point for your shut-off valves.
UV Resistance: Unlike PEX, copper won’t break down if it's exposed to sunlight, making it the only choice for certain outdoor applications.
For many homeowners, the final call comes down to the project's unique needs and budget. If you’re weighing the benefits of a full system overhaul, check out our guide on when you should consider upgrading to copper pipes.
Drain and Vent Pipes: PVC vs. ABS
For the Drain-Waste-Vent (DWV) system—the non-pressurized pipes that carry waste away—the choice is between two types of rigid plastic: PVC and ABS.
PVC (Polyvinyl Chloride) is the familiar white plastic pipe you see in most projects. It’s tough as nails and relies on a two-step solvent welding process (primer followed by cement) to create an incredibly secure bond.
ABS (Acrylonitrile Butadiene Styrene) is the black plastic pipe. Its main draw is a slightly simpler installation. It uses a one-step cement that chemically fuses the pieces together without needing a separate primer first.
The decision between PVC and ABS often comes down to local code and what a plumber is used to working with. Both are fantastic, approved materials for DWV systems in Los Angeles, but they don't play well together. You can't just cement them to each other; a special transition coupling is required if you ever need to join the two.
Navigating Permits and Passing LA County Inspections
In Southern California, getting your plumbing rough-in signed off by a city inspector isn't just a friendly suggestion—it’s the law. This step is a critical safeguard for your property, your safety, and the long-term value of your home. Trying to sidestep the permit process is one of the most expensive shortcuts you can take on any construction project in Los Angeles.
Skipping this crucial check can unleash a torrent of problems. You're looking at hefty fines and stop-work orders that can bring your entire project to a grinding halt. Even worse, unpermitted work creates a legal and financial nightmare when you try to sell your home, often forcing you to rip open brand-new walls just to prove the plumbing was done to code. Think of a permit as the official seal of approval that your project was built to last.
What LA County Inspectors Look For
When an inspector from the Los Angeles Department of Building and Safety (LADBS) shows up, they’re not just taking a quick look. They’re conducting a meticulous review to ensure every piece of your plumbing system meets the strict standards of the California Plumbing Code. They have a trained eye for the small details that prevent catastrophic failures down the road.
While their checklist is long, inspectors zero in on a few make-or-break areas:
Proper Pipe Support: Every single pipe—supply, drain, and vent—must be securely strapped down. Pipes that sag, even slightly, can mess with the drain slope and strain the joints, which is a recipe for future leaks.
Correct Drain Slope: This is non-negotiable. Inspectors will pull out their level to confirm all horizontal drain lines have the mandatory ¼-inch per foot slope. It’s the only way to guarantee waste flows downhill and away from your home.
Leak-Free Connections: Every joint gets a close look. They’re checking for clean, perfectly sealed connections, whether it’s a solvent-welded PVC joint or a precisely crimped PEX fitting.
Approved Materials: They’ll verify that all pipes and fittings are approved for use in California and that you haven't mixed materials that don't belong together.
Passing Your Rough-In Inspection the First Time
Failing an inspection is a gut punch. It means delays, rework, and more money out of your pocket. To sail through on the first try, you need to be prepared. This is about more than just doing the work—it’s about having the job site ready for a professional review.
The plumbing inspection is the ultimate quality control check for the work hidden inside your walls. It’s an independent verification that your system is built for long-term safety and performance, protecting your home from the ground up.
Before you even think about calling the inspector, go over this checklist with your plumber:
Conduct Pressure Tests: The entire water supply system needs to be pressurized (with air or water) to a specific PSI and hold it for a set amount of time. The inspector will want to see that pressure gauge holding rock-steady, proving there are zero leaks.
Ensure Clear Access: Don't make the inspector climb over piles of lumber or squeeze through tight spaces. The entire rough-in needs to be safe and easy to access.
Have Paperwork Ready: Keep your approved plans and the official permit card right there on-site. The inspector will need to review them first thing.
Keep Stub-Outs Capped: For the pressure test to work, all the pipe stub-outs for sinks, toilets, and showers must be temporarily capped or plugged.
Knowing what inspectors are looking for is half the battle. To get an even better sense of what a professional evaluation involves, you can learn more about the importance of plumbing inspection services from our team. When you partner with a licensed plumber who lives and breathes LA County code, you can navigate the permit process without the headaches, keeping your project moving forward on time and on budget.
Ensuring a Flawless Rough-In for Your Project
While this guide gives you a solid blueprint, turning those plans into a bulletproof plumbing system is where the real magic happens. With over two decades of experience serving the Greater Los Angeles area, from Pasadena to Santa Monica, we know a flawless rough-in is the absolute bedrock of a healthy home. It’s not just about connecting pipes—it’s about having the foresight to do it right the first time.
We design and install systems that are built to prevent future headaches. Think of it as an insurance policy buried in your walls. By meticulously planning every detail, we make sure your project flies through inspection and keeps your construction or renovation timeline right on track.
Protecting Your Investment from the Ground Up
Whether you’re building a new home from scratch or tackling a complex commercial renovation in Glendale, our process is obsessively detailed. We make sure every single component is perfectly placed, secured, and tested long before the drywall goes up. This is how you protect your investment from the inside out.
Our focus is on building a plumbing network that delivers peak performance and genuine peace of mind. That expertise translates directly into a system you can count on for decades, free from the amateur mistakes that can turn into costly nightmares down the road.
At ZH Plumbing, we don’t see the rough-in as just another step in construction. We see it as our promise of quality—a foundation of reliability that will keep your property safe and sound long after we’ve packed up our tools.
Why Los Angeles Experience Really Matters
Navigating the web of plumbing codes and unique environmental factors across Los Angeles County isn't for beginners. We've spent 20 years mastering these local requirements, which means we get your project approved on the first go.
Our deep understanding of LA's building standards allows us to see potential roadblocks before they become problems, creating smart, efficient solutions on the fly. Hiring an experienced, licensed team isn't just a good idea; it's the single best way to guarantee your plumbing is built to last, safeguarding your investment and giving you the reliability you deserve.
Your Plumbing Rough-In Questions, Answered
When you're knee-deep in a renovation or new build in the Los Angeles area, the plumbing rough-in stage can bring up a lot of questions. Getting clear answers is the key to keeping your project on track and avoiding headaches down the road. Here are some of the most common questions we get from homeowners and contractors.
How Long Does a Plumbing Rough-In Take?
Honestly, it all comes down to the size of the job. For a straightforward, single-bathroom remodel in a typical Los Angeles home, a skilled plumber can usually wrap up the rough-in within 1 to 3 days.
But if we're talking about plumbing an entire new house from the ground up, you're looking at a week or more. The final timeline really depends on how many bathrooms, kitchens, and laundry rooms are involved, the complexity of the layout, and how smoothly the work is coordinated with the framers, electricians, and other trades on-site.
Can I Do My Own Plumbing Rough-In in California?
Legally, California might let a homeowner pull their own permits for plumbing work, but this is one area where DIY can be a recipe for disaster. We strongly advise against it. The California Plumbing Code is a beast—it's incredibly detailed, and a small mistake hidden behind a wall can turn into an expensive, destructive nightmare later on.
Every bit of rough-in plumbing has to pass a tough inspection by a local official. If you fail, your entire project comes to a screeching halt until it's fixed, which means delays and more money out of your pocket. Hiring a licensed plumber isn't just a cost; it's an investment in getting the job done right, safely, and up to code the very first time.
What Are the Most Common Rough-In Mistakes?
After years of working on job sites across Greater LA, we’ve seen the same handful of mistakes cause the biggest problems. These are the ones that keep plumbers up at night:
Bad Drain Slope: It might not seem like a big deal, but getting the ¼-inch per foot slope wrong is a classic error. Even a tiny deviation can lead to constant clogs and drains that just don't work.
Improper Venting: This is a huge one. Without proper vents, you can end up with sewer gas smells in your home or those slow, gurgling drains that are desperately trying to pull in air.
Inaccurate Fixture Measurements: Being off by just an inch can make it impossible to install a toilet, vanity, or shower later on without tearing out brand-new drywall. Measure twice, cut once is the mantra here.
Skipping Pressure Tests: This is a critical failure. Before any walls are closed up, the water lines must be pressure tested. Finding a tiny, weeping leak after the drywall is up can lead to catastrophic water damage and mold.
A professional plumber’s real job during a rough-in isn’t just connecting pipes. It's preventing these exact, costly mistakes. Think of their expertise as essential quality control for your home's hidden infrastructure.
What Is the Difference Between Rough-In and Finish Plumbing?
It’s pretty simple when you break it down into two phases.
Rough-in plumbing is everything that happens behind the scenes, before any drywall goes up. This is when all the water supply lines, drain pipes, and vent stacks are installed inside the walls, floors, and ceilings. It's the skeleton of your plumbing system.
Finish plumbing is the final act. It happens after the walls are painted and the floors are in. This is when the plumber comes back to install all the fixtures you see and use every day—faucets, toilets, showerheads, sinks—and connects them to the pipes installed during the rough-in.
Navigating a plumbing rough-in takes more than just tools; it requires a deep understanding of local building codes and years of experience. If you still have questions or need a professional team for your Los Angeles project, ZH Plumbing is here to help. We make sure every job is done right, from the initial layout to passing that final inspection.
For a consultation or to schedule service, visit us online at zhplumbing.com.