


A Guide to Water Heater Flushing for Los Angeles Homes
- Dec 31
- 14 min read
Is an ice-cold shower ruining your morning? Have you noticed your energy bills creeping up for no obvious reason? These aren't just minor annoyances—they're often clear signals that your water heater is struggling with sediment buildup.
For homeowners, water heater flushing is one of the most effective maintenance tasks you can perform. This simple process clears out the mineral deposits that hurt your heater's performance, helping it run more efficiently and last for years. In a place like Los Angeles with notoriously hard water, regular flushing isn't just a good idea; it's essential for reliable hot water and keeping utility costs under control.
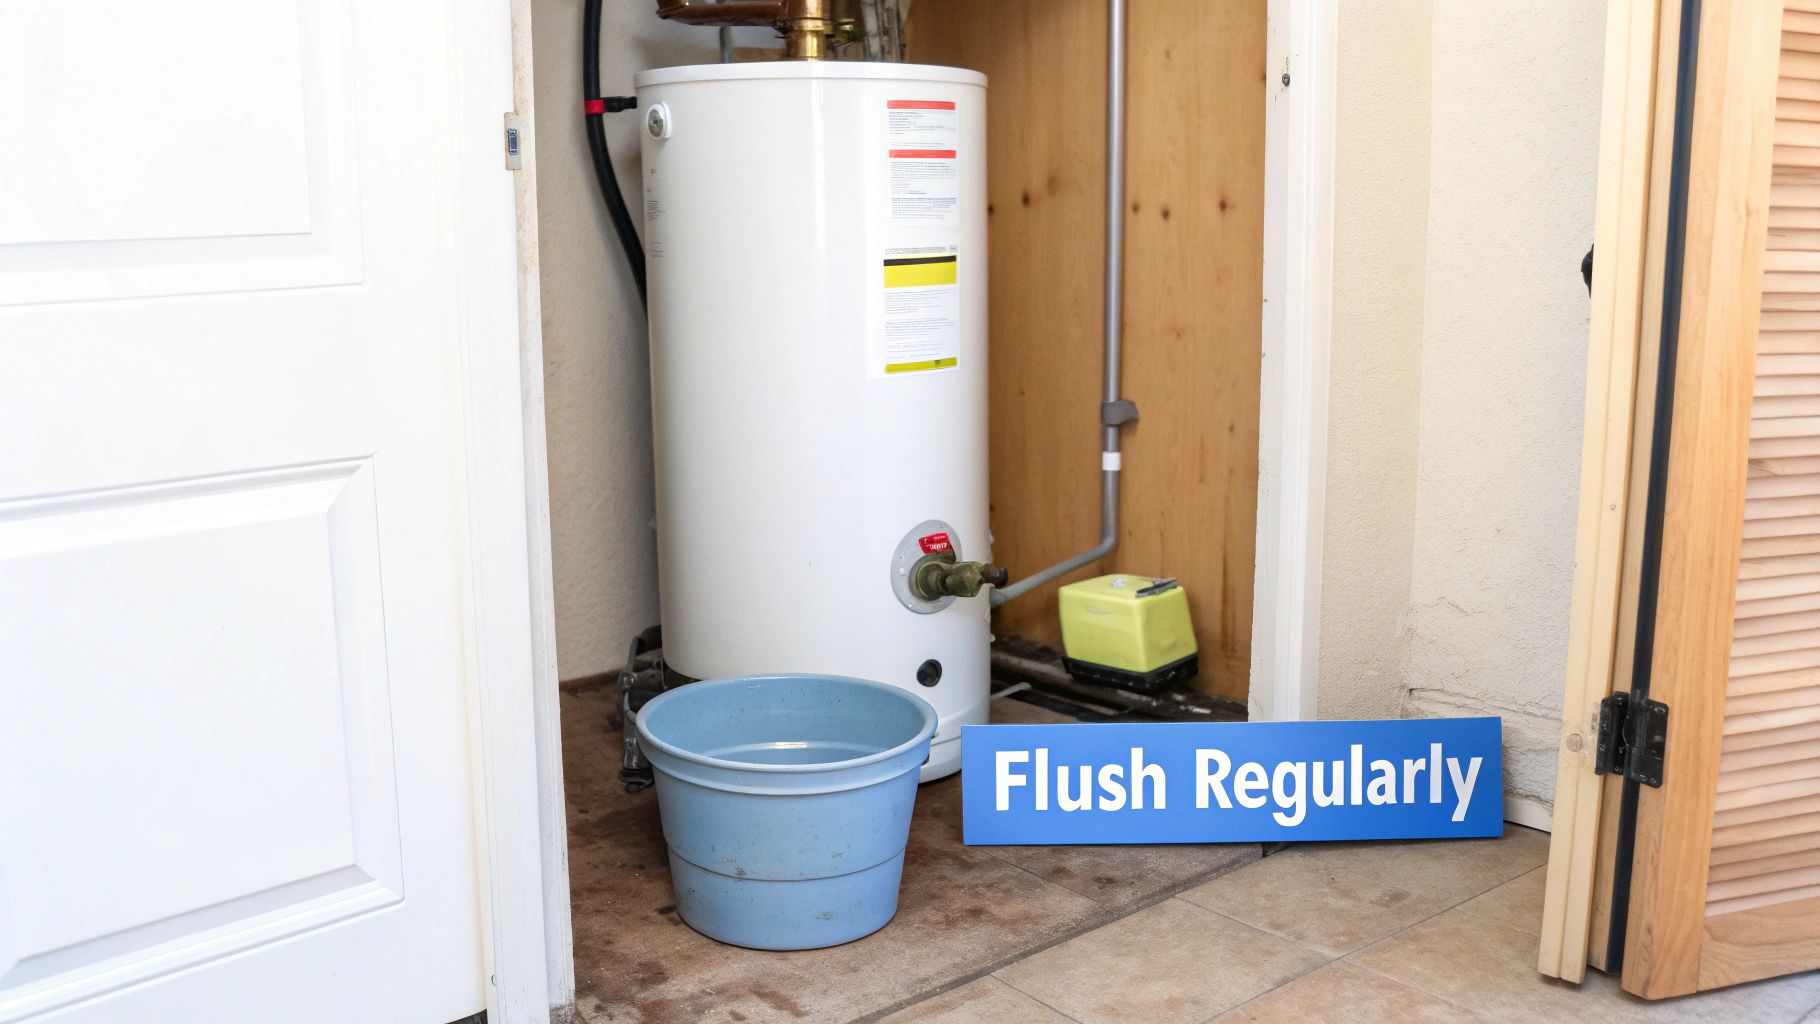
Why Your Water Heater Needs Regular Flushing in Los Angeles
Imagine it's a busy morning, and just as you step into the shower, the hot water vanishes. This frustrating scenario is more common than you think. A significant number of water heaters fail prematurely, not from old age, but from simple neglect.
Over time, minerals like calcium and magnesium settle at the bottom of the tank, forming a thick layer of sludge. This sediment acts as a barrier, forcing your heater's burner or elements to work much harder to heat the water.
The Hidden Costs of Sediment Buildup
That extra workload isn't just happening quietly in your garage. It has real, tangible consequences that affect your comfort and your wallet.
The most immediate impact is a spike in your utility bills. As the heater fights against that layer of sediment, its efficiency can drop dramatically. We've seen cases where severe buildup slashes efficiency by up to 50%, adding hundreds of dollars to energy costs over a year. To understand the bigger picture, it helps to look at your total home appliances' electricity consumption, where water heaters are often a major contributor.
Beyond the cost, this constant strain puts immense wear and tear on the unit’s components, which can dramatically shorten its lifespan.
Sediment doesn't just waste energy; it creates hotspots on the bottom of the tank. These hotspots can weaken the steel over time, leading to slow leaks or even a catastrophic tank failure. A simple annual flush is your best defense.
Key Benefits of a Proper Water Heater Flush
The good news is that a regular flush directly tackles these problems and offers some massive advantages for any homeowner.
To see just how big the difference is, take a look at the long-term outcomes.
Quick Look: Maintained vs. Neglected Water Heater
Benefit | With Regular Flushing | Without Regular Flushing |
|---|---|---|
Lifespan | Can reach or exceed its 10-15 year expected life | Often fails prematurely, sometimes in just 5-7 years |
Efficiency | Maintains peak performance, keeping energy bills low | Efficiency can drop by up to 50%, increasing costs |
Hot Water | Consistent and reliable hot water supply | Unpredictable supply, often runs out quickly |
Noise | Operates quietly | Prone to popping and rumbling sounds |
Repairs | Fewer unexpected breakdowns and costly repairs | Frequent component failures and risk of tank leaks |
As you can see, the benefits are clear and directly impact your wallet and peace of mind.
Here’s what you gain from staying on top of it:
Improved Energy Efficiency: By clearing out that insulating sediment, you let the heat transfer directly to the water. This restores the unit's original efficiency and immediately starts lowering your energy bills.
Longer Appliance Lifespan: Regular maintenance is everything. Preventing overheating and component strain can help your water heater hit or even beat its expected 10-15 year lifespan. We cover more on this in our guide to 8 essential water heater maintenance tips.
Consistent Hot Water Supply: A clean tank heats water faster and holds it at temperature more effectively. No more frustrating moments when the hot water cuts out mid-lather.
Quieter Operation: Ever hear a rumbling or popping sound from your water heater? That’s often water getting trapped and boiling under the sediment. Flushing gets rid of the noise and the problem.
For anyone living in the Los Angeles area, knowing how to do this is a core part of responsible homeownership. Here at ZH Plumbing, we've seen firsthand how this simple task can save homeowners thousands by avoiding a costly emergency replacement.
Gathering Your Tools for a Safe and Successful Flush
Before you start, taking a few minutes to gather the right gear is the most important part of the job. This isn’t just about making the flush go smoothly; it’s about doing it safely and avoiding a huge mess.
Having everything you need ready to go means you won't be scrambling mid-flush, which is when mistakes happen. The good news? Most of these are common tools you probably already have.
Essential Tools and Equipment
Think of this as your pre-flight checklist. Each item has a specific job to ensure the flush is effective and you stay safe.
Here’s exactly what you’ll need to get started:
Garden Hose: A standard hose, at least 10-15 feet long, is perfect. Just make sure it’s long enough to reach from your heater’s drain valve to a safe spot like a floor drain, utility sink, or out into your yard.
Bucket or Drain Pan: Absolutely crucial for catching that first gush of water and any drips. It's also handy for checking how clear the water is running. A 5-gallon bucket is ideal.
Channel-Lock Pliers or a Wrench: You might need a little extra leverage to get a stubborn drain valve open. Plastic valves especially can get sticky, and pliers give you the gentle force you need without risking a crack.
Work Gloves: The water in that tank is hot. A good pair of heat-resistant gloves will protect your hands from potential burns and help you get a solid grip.
Flathead Screwdriver: For most gas water heaters, you'll need this to turn the thermostat dial to the "Pilot" setting.
A common mistake is assuming the plastic drain valve will twist open by hand. After years of sitting untouched, these valves can be seriously stiff. Having pliers ready from the start saves a lot of frustration and stops you from forcing the valve and breaking it.
Safety First: Power Down Before You Start
This is the one step you absolutely cannot skip. You must shut down the power or fuel source to your water heater before doing anything else. Skipping this can create a seriously dangerous situation or damage your unit.
For an Electric Water Heater:
Go to your home's main electrical panel. Find the breaker labeled for your water heater and flip it to the "OFF" position. This is non-negotiable. Draining the tank while the electric heating elements are on will cause them to burn out in seconds.
For a Gas Water Heater:
Look for the gas control knob on the front of the unit, usually near the bottom. Turn the dial from "ON" to the "PILOT" setting. This stops the main burner from kicking on while you work but keeps the pilot lit so restarting is easy. You should also find the main gas shut-off valve on the pipe leading to the heater and turn that to the off position.
Once the energy source is cut, shut off the cold water supply to the tank. You'll see a valve, often with a blue handle, on the pipe feeding cold water into the top of the heater. Turn it clockwise until it stops. This prevents more water from entering while you're trying to drain it.
Taking these precautions sets you up for a controlled, safe water heater flushing. For homeowners who want an extra layer of defense against leaks, installing automatic water shut-off valves can be a real game-changer. These smart devices detect leaks and immediately stop the water flow, preventing catastrophic damage.
How to Properly Flush Your Tank Water Heater
Alright, you’ve got your tools and you’ve run through the safety checks. Now for the hands-on part. This process is straightforward, but the details make the difference between a quick, successful flush and a frustrating afternoon. Let's walk through the exact steps we plumbers use to get the job done right.
Our goal isn't just to drain the tank; it's to create enough turbulence to break loose all that gunk and sediment that's settled at the bottom. That's the secret to getting your heater running efficiently again.
This simple flowchart breaks down the three core moves: cutting the power, hooking up the hose, and opening the valve.
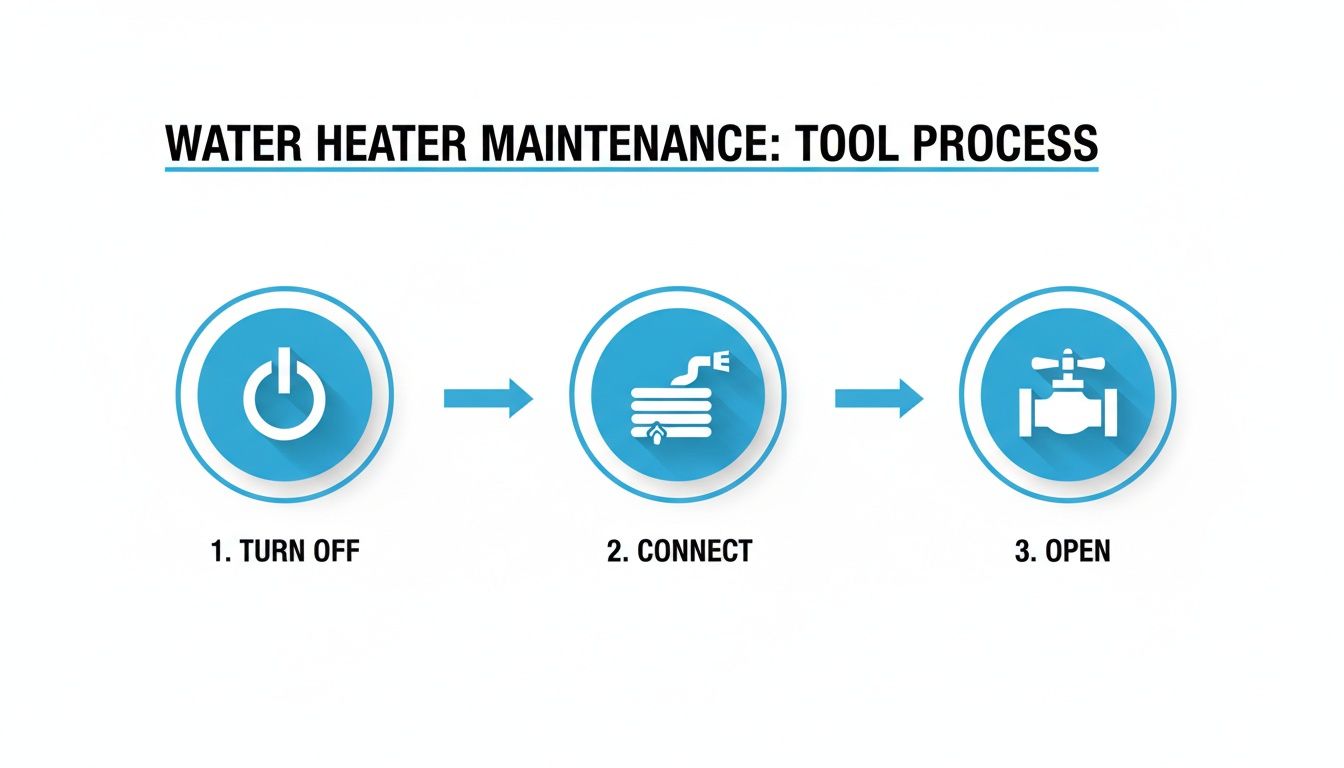
Think of this as your game plan. Following this sequence ensures you're working safely and in the right order.
Connect the Hose and Manage Pressure
First, find the drain valve near the bottom of your water heater. Screw your garden hose onto it, making sure it’s snug so you don’t end up with a puddle. Run the other end of the hose to a safe place for drainage—a floor drain, a utility sink, or outside on a driveway where the hot, rusty water won't harm your lawn.
Next, we need to relieve the pressure in the tank. Go to the nearest sink and turn on the hot water tap. You’ll probably hear some sputtering as air enters the lines, which is normal. Leaving this faucet on prevents a vacuum from forming inside the tank, letting the water drain out smoothly.
Opening the Drain Valve and Starting the Flush
Now it's time to open the drain valve. If you have a plastic one, use your channel-lock pliers for a gentle but firm grip and turn it counter-clockwise. For brass valves, a flathead screwdriver or the valve's handle will work.
Pro Tip: Go slow when opening the valve. If it’s been a while, it might be stuck. Do not force it. Old plastic valves can get brittle and snap, turning a simple maintenance task into an emergency leak. A little steady pressure is all it takes.
Once you get it open, the water will start flowing. Don't be surprised if it looks cloudy, rusty, or even sandy. That’s actually a good sign! It means you’re clearing out all the sediment that's been dragging down your heater's performance. Let the tank drain completely; this can take anywhere from 10 to 30 minutes, depending on its size.
Using Cold Water Bursts to Agitate Sediment
With the tank empty, the real cleaning begins. Keep the drain valve open, head back to the cold water inlet valve on top of the heater, and open it for a short blast of 15-20 seconds. This shot of cold water will stir up the heavy sediment caked onto the bottom of the tank.
Let that murky water drain out, then do it again. Repeat this process three to five times. You're basically power-washing the inside of your tank from the top down.
Keep an eye on the water coming out of the hose. The goal is to continue these cold-water flushes until it runs clear. Once it looks like clean tap water, you've nailed the most important part of the water heater flushing process. This step is often skipped in DIY guides, but it makes a huge difference. Our article on common water heater mistakes covers why just draining the tank isn't enough.
Refilling the Tank and Restoring Power
Now that the gunk is gone and the water is running clear, it's time to get your system back online.
Follow this sequence exactly:
Close the Drain Valve: Make sure the drain valve at the bottom of the tank is closed tightly.
Disconnect the Hose: Carefully unscrew the garden hose. Have your bucket ready for any leftover water.
Open the Cold Water Inlet: Fully open the cold water supply valve to start refilling the tank.
Monitor the Hot Water Faucet: Remember that sink faucet you left on? As the tank fills, it's pushing all the air out through that tap. Let it run until you get a steady, solid stream of water with no more sputtering. This is crucial for preventing damage to the heating elements in electric models.
Turn Off the Faucet: Once the flow is smooth, turn off the hot water faucet.
Your tank is now full and ready for power.
Final Checks and Powering Up
The last step is to bring your unit back to life.
For a gas water heater: Turn the gas control knob from the "PILOT" setting back to "ON" or your usual temperature setting. If the pilot light went out, follow the manufacturer's instructions printed on the side of the tank to relight it.
For an electric water heater: Head back to your circuit breaker panel and flip the switch for the water heater back to the "ON" position.
Listen for any unusual noises and give the drain valve one last check for drips. In about 20-60 minutes, you should have plenty of hot water. If you spot a persistent leak from the valve or hear that same old rumbling noise, it could be a sign of a bigger problem that needs a professional eye from a team like ZH Plumbing.
Flushing a Tankless Water Heater: What You Need to Know
As more Los Angeles homeowners switch to tankless water heaters for their efficiency, it's crucial to understand they have unique maintenance needs. Unlike a traditional tank that collects loose sediment, tankless units face a different enemy from our hard water: mineral scale buildup. This hard, crusty deposit clings to the inside of the heat exchanger.
Think of this buildup like cholesterol in an artery. It narrows the tiny pathways where water flows, forcing the unit to work harder to heat your water. This reduces efficiency and can lead to permanent damage to the heat exchanger—the most expensive part to replace.
Instead of a simple "flush," tankless heaters need a process called descaling. This involves circulating a special solution through the unit to dissolve and wash away those hardened mineral deposits.
Understanding the Descaling Process
Descaling is more involved than draining a tank and requires specific gear. The goal is to isolate the unit from your home's plumbing and create a closed loop to cycle the cleaning solution through it.
Here’s a quick rundown of how it works:
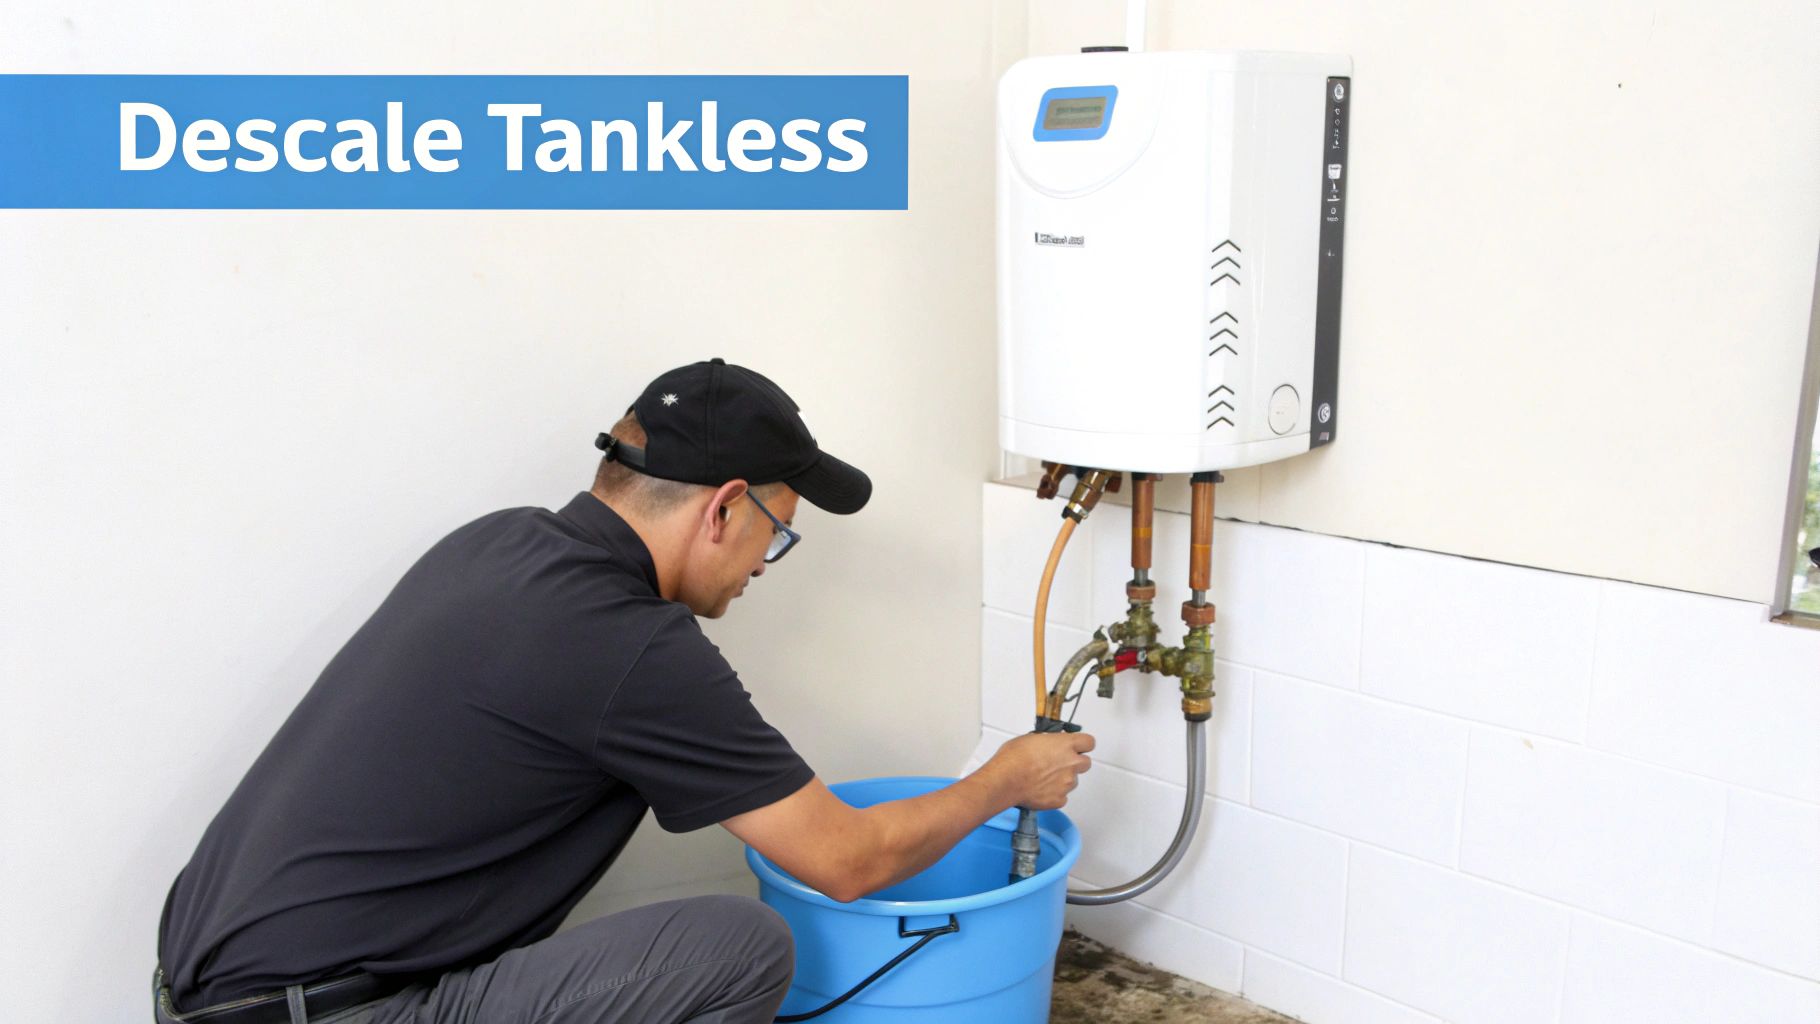
Isolating the Unit: First, the power and water supply to the heater are shut off. We use the isolation valves (often called service valves) to temporarily disconnect the heater from your home’s water lines.
Connecting Hoses: Two hoses are attached to these service valves—one for the inlet and one for the outlet.
Circulating the Solution: The other ends of the hoses go into a bucket with the descaling solution. A small submersible pump pushes that liquid through the heat exchanger for about 45-60 minutes.
Final Fresh Water Flush: After descaling, the unit is flushed with fresh water to clear out any remaining solution before being reconnected to your home's system.
While you can find DIY descaling kits, the risk of making a bad connection or not flushing completely is high. One mistake could damage the unit or leave a chemical taste in your water. For most homeowners, calling a pro is the safer choice.
Why Professional Descaling Is Often the Smart Choice
Descaling a tankless unit is a delicate job. Those heat exchangers are finely tuned, and using the wrong solution or pressure can cause irreparable damage. In fact, many manufacturers require professional maintenance to keep your warranty valid, especially in areas like Greater Los Angeles with hard water.
A professional plumber from ZH Plumbing has the right equipment, like the pump and proper descaling agents, and the expertise to do the job safely. We'll also inspect the unit for any other potential issues. If you're curious about these high-efficiency systems, you can learn more about what a tankless water heater is and how it works in our detailed guide.
For owners of these systems, scheduling a professional descaling once a year is the single best way to protect your investment and ensure you enjoy endless, efficient hot water for years to come.
When to Call a Professional Plumber
While flushing your water heater is great preventive maintenance, it’s not a cure-all. Some symptoms are red flags for deeper issues that a simple flush won't fix. Knowing when to call a professional can save you from a major headache and a much bigger repair bill.
A DIY flush is like changing your car’s oil—essential for routine care. But if your engine is making a loud clanking noise, an oil change isn't the answer. The same logic applies here.
Persistent Noises After Flushing
You've finished the flush, the water ran clear, but that annoying popping or rumbling sound is still there. What gives?
If the noises persist, it’s a strong sign that the sediment has hardened into a solid layer at the bottom of the tank. A standard flush simply can't break that stuff loose. This heavy scale creates dangerous hot spots on the tank floor, causing the water trapped underneath to boil. Left unchecked, this can weaken the tank's steel lining and create a serious leak risk.
A Stuck or Leaking Drain Valve
One of the most common issues during a DIY flush is a stubborn drain valve. Mineral buildup can seize them completely over time, and older plastic models can become incredibly brittle.
Here’s what you might run into:
A Seized Valve: You’re applying steady pressure, but the valve won't budge. Forcing it is a huge mistake. You risk snapping it off, which will cause an unstoppable flood.
A Leaky Valve: You’ve finished the flush and closed the valve, but it keeps dripping. This usually means the internal washer has failed or the valve body is cracked.
In either of these situations, a professional plumber can safely replace the faulty drain valve without damaging the tank itself.
A large portion of the $15 billion global water heater repair industry comes from problems that started small. In fact, 20% of failures are directly tied to maintenance neglect. On the flip side, regular flushing can boost efficiency by 30-50%, showing how much impact this one task has. Discover more insights about water heater repair trends on datainsightsmarket.com.
Water Remains Rusty or Discolored
You’ve been flushing the tank with cold water for what feels like forever, but the stream coming out of your hose is still a murky, rusty brown. This is a major warning sign.
A little rusty water at the beginning is normal. But if it won't clear up, you’re likely seeing signs of significant internal corrosion. This almost always means the sacrificial anode rod—a metal rod designed to corrode so your tank doesn’t—is completely gone. Once it’s depleted, the water begins eating away at the tank’s steel walls. A flush can't reverse that kind of damage; the tank itself is likely nearing the end of its life.
If you’re dealing with a serious malfunction late at night or on a weekend, you might need to find an after-hours plumbing service.
Recognizing these symptoms is key. If you're facing any of these issues in the Greater Los Angeles area, the safest bet is to schedule a diagnostic visit. If you aren't sure who to trust, our guide on how to choose the right plumber for your home has some great tips. A trained technician from ZH Plumbing can pinpoint the real problem and provide a solution that lasts.
Got Questions About Flushing Your Water Heater? We've Got Answers.
Even after walking through the steps, it’s normal to have a few questions. To help, we’ve gathered the most common questions we hear from homeowners across Los Angeles with straightforward answers.
How Often Should I Flush My Water Heater in Los Angeles?
The ideal frequency depends on your local water quality, and in Los Angeles, our water is notoriously hard.
For a standard tank-style water heater, you should flush it every 6 to 12 months. This schedule prevents sediment from building up and hardening at the bottom of your tank. If you have an older heater or suspect it's never been flushed, once a year is a great place to start.
Tankless heaters are different and need to be descaled at least once a year. This prevents mineral buildup from clogging the heat exchanger and reducing its performance.
Can I Accidentally Break My Water Heater by Flushing It?
While flushing is a generally safe DIY job, there are a few risks, especially with an older, neglected unit. The biggest weak point is usually the drain valve.
After years of non-use, plastic drain valves can become brittle and might crack or leak when you try to turn them. Likewise, if your heater is over 10 years old and has never been flushed, the sediment might be hiding small cracks or weak spots in the tank's lining. In these cases, it's much safer to have a professional handle the first flush.
What's the Water Supposed to Look Like When I Flush It?
Don't be alarmed by what comes out of the hose initially. It’s completely normal for the water to look cloudy, rusty, or full of sandy-looking particles when you first open the valve.
That murky water is actually a good sign! It's proof you're getting rid of the sediment that has been harming your heater's efficiency.
The key is to watch for the water to change. As you continue flushing, it should gradually start to run clear. If it stays discolored after several minutes, that could point to serious internal corrosion, meaning it's time to call a professional for an inspection.
Is It Really Worth Paying a Plumber to Flush My Water Heater?
Yes, hiring a professional for a water heater flushing is a smart investment because you're getting much more than just a simple drain-and-fill. A licensed plumber performs a full maintenance check-up.
This typically includes:
Anode Rod Inspection: They’ll check the condition of this critical component. Replacing a worn-out anode rod can add years to your heater’s life.
T&P Valve Test: The Temperature and Pressure relief valve is a crucial safety device. A plumber will ensure it's working correctly.
Early Warning Sign Detection: Pros are trained to spot the subtle signs of leaks, corrosion, or other issues that most homeowners would miss.
The small cost of a professional service provides a huge amount of peace of mind and is a much better deal than facing the stress and expense of an emergency water heater replacement.
If you still have questions or decide your water heater could use a professional touch, the team at ZH Plumbing is here to help. We provide expert water heater flushing and maintenance across the Greater Los Angeles area to keep your system running smoothly for years. Schedule your service with us today!
Comments